Cloud record any security camera stream. Watch your recordings through the web. Never miss any event occurrence.
There are two ways to cloud record your security camera footage: FTP Cloud Recording and Server-Side Cloud Recording. Both methods ensure your footage is securely stored and easily accessible from anywhere. Choose the option that best fits your needs.
FTP Cloud Recording
With FTP Cloud Recording, you configure your security camera to upload frames to the IP Camera Master cloud at regular intervals (e.g., every second). This method is cost-effective and ideal for users who want an affordable way to store and access recordings. Once set up, you can view and manage your recordings directly from the IP Camera Master panel. You can also live watch frames through your ip camera master panel.
Step-by-Step Guide to FTP Cloud Recording
Step 1: Create Camera and Note FTP Crendentials
Create a camera from ip camera master panel. You can choose camera type any type since FTP is supported for all cameras, type doesnt matter.
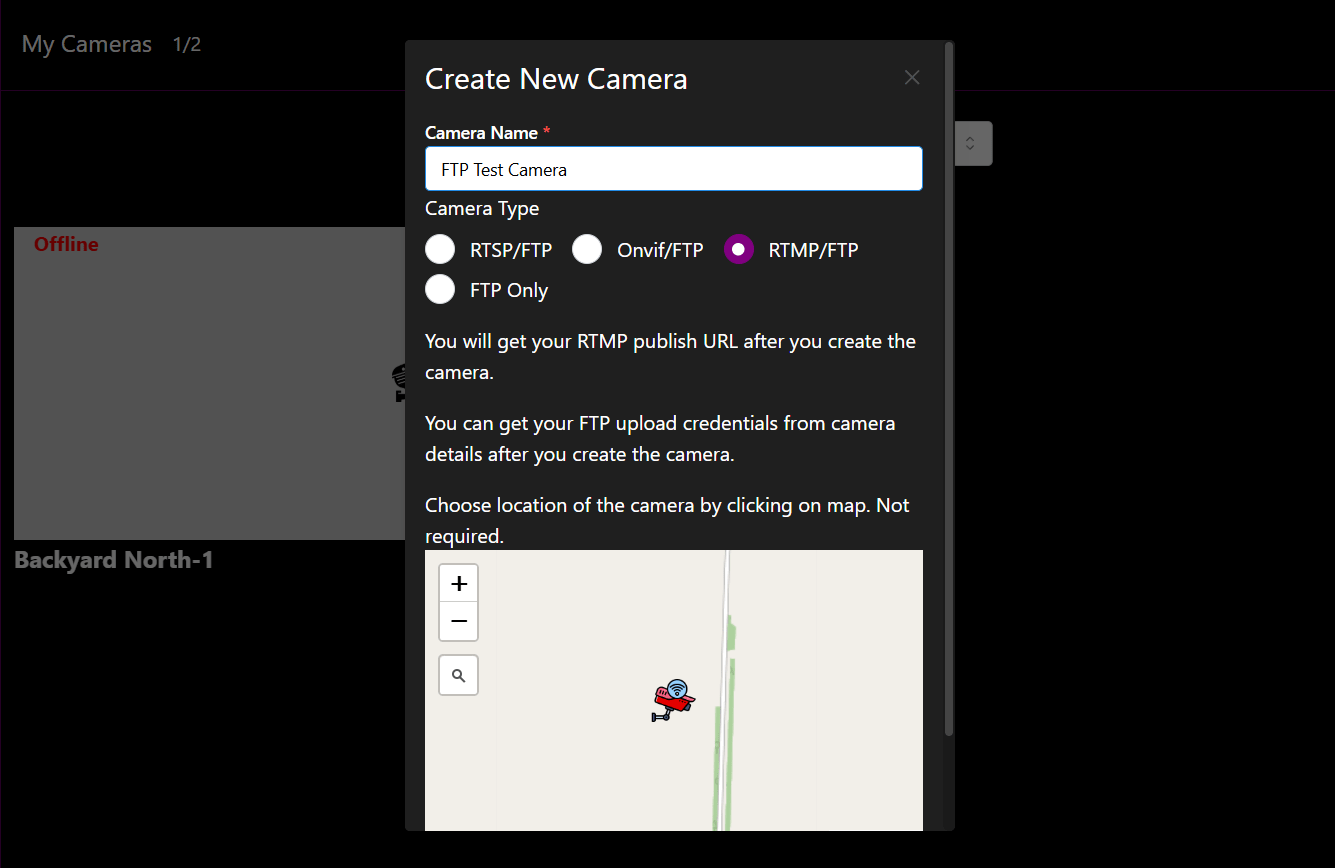
After creation from camera page click Actions -- Camera Settings. Here you will see ftp endpoint of your camera and a password. We will use those to connect your security camera to ip camera master through FTP.
You will need 3 fields:
1- Username (Your ip camera master account email)
2- Endpoint (Get from camera settings eg ftp.ipcameramaster.com)
3- Camera Password (Get from camera settings)

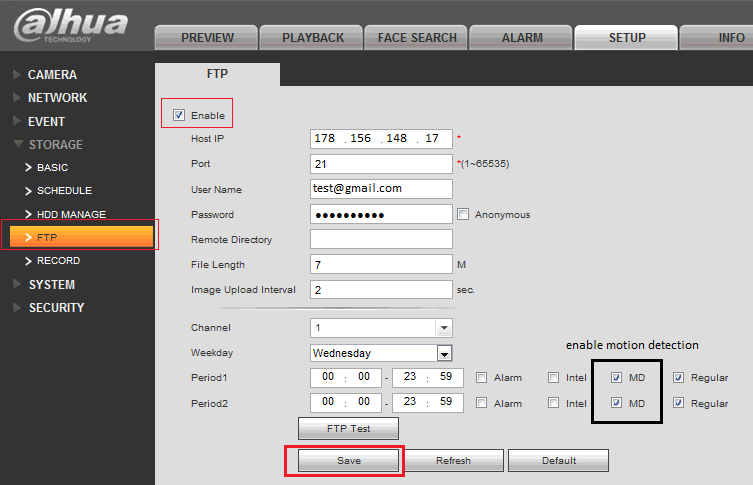
Step 2: Enable FTP and Set Credentials From Camera Panel
Once you connect security camera to your local network via ethernet cable or wifi, you should be able to access its panel through its IP Address. You can learn your cameras IP address by installing its manufacturer software to your local computer. Once you can access your camera firmware panel, go to FTP menu. Enable FTP. This menu can change from security camera manufacturer to manufacturer but most fields should be common.
Host IP : 178.156.148.17 or Ftp Endpoint: ftp.ipcameramaster.com
Port:21
Username: Your ip camera master account email
Password: Your camera password
Set the image interval as you desire, for example 2 every second.
If there is a checkbox to add DateTime to file names check it.
Leave subfolder related inputs empty.
Some cameras allow motion detection or periodic upload, if you desire you can also configure those. This way you wont upload unnecessary frames.
From other menus you can configure frame quality/resolution.
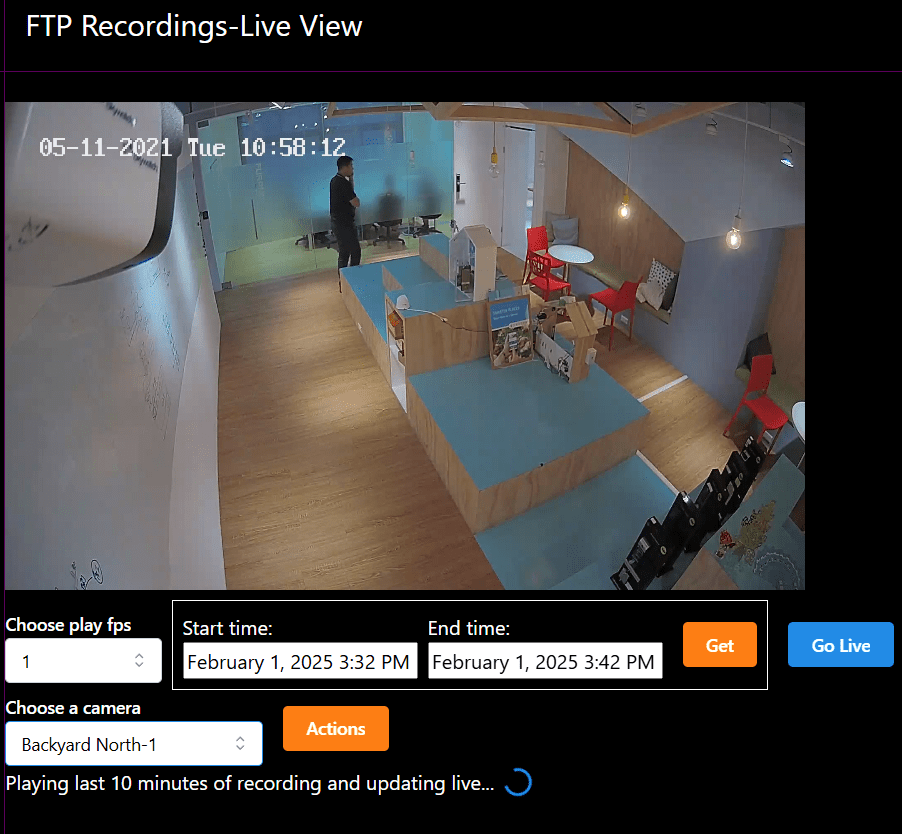
Step 3: Live Watch FTP Camera Through IP Camera Master Panel
Once FTP configuration on your camera is complete, you should be able to live view ftp recordings through ip camera master. Login to your ip camera master account.
Click "FTP" from left navigation menu. Choose desired camera. Now you can live watch frames, filter by date and time or download frames to your local computer.
Server Side Cloud Recording
Server side cloud recording feature records entire camera stream on server. For this your camera must be connected to IP Camera master via RTSP, RTMP or ONVIF. IP camera master captures the flowing stream and records it. If you are utilizing webrtc low latency camera watch, you can use this method to record entire stream on server side.
Step-by-Step Guide to Server Side Cloud Recording Your IP Camera
Step 1: Get an IP Camera Master Account With Server Side Cloud Recording Feature
Server side cloud recording is a paid feature and is not available in trial accounts. You can purchase this feature through the Pricing page or the account section in your dashboard.
Step 2: Add a camera and make sure it is Live
Add a new camera through your dashboard. Then connect your camera with RTSP, Onvif or RTMP. If you don’t know how to connect your camera to IP Camera Master, check this page. Once connected, make sure the camera status is set to "Live."
Step 3: Enable recording for the camera
Once the camera status is live, click on **Actions** on the Camera page. Click on camera settings, check "Enable Recording," and then click "Save."
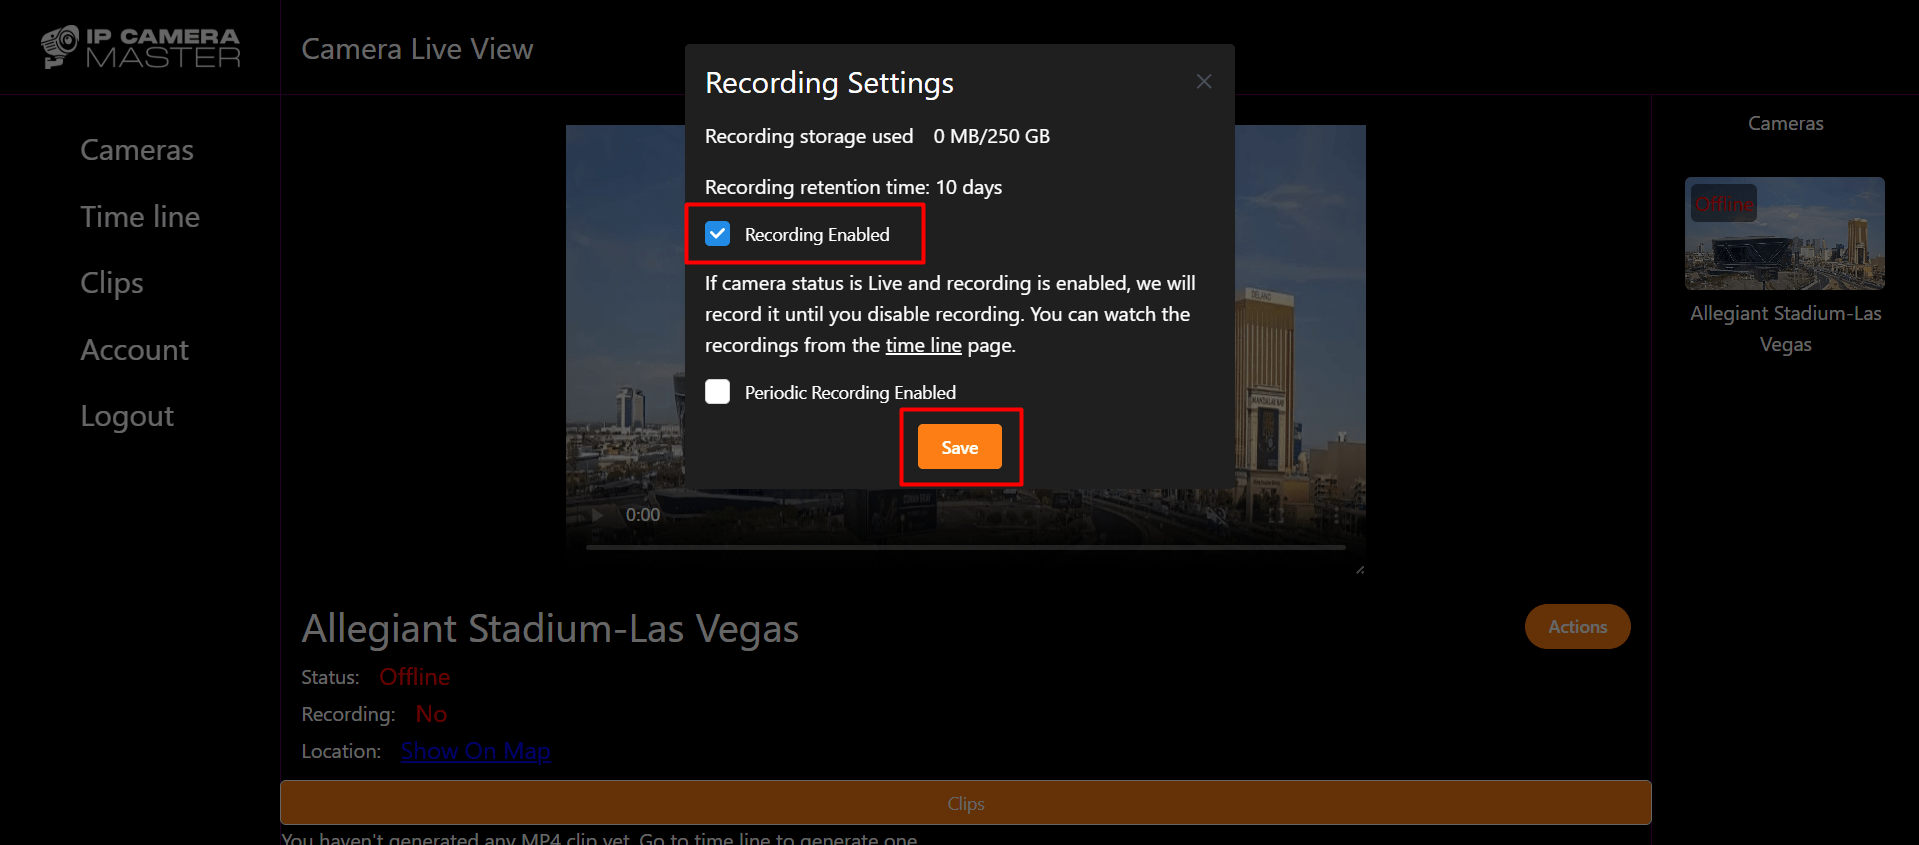
Cloud recording will start immediately if the camera status is "Live." If the status is not "Live," recording will begin automatically once the status changes to "Live."
Step 4: Watch recordings through the Timeline page
You can start watching recordings immediately after they begin on the Timeline page. To access it, go to the Camera page, click on **Actions**, and then select **Timeline**.
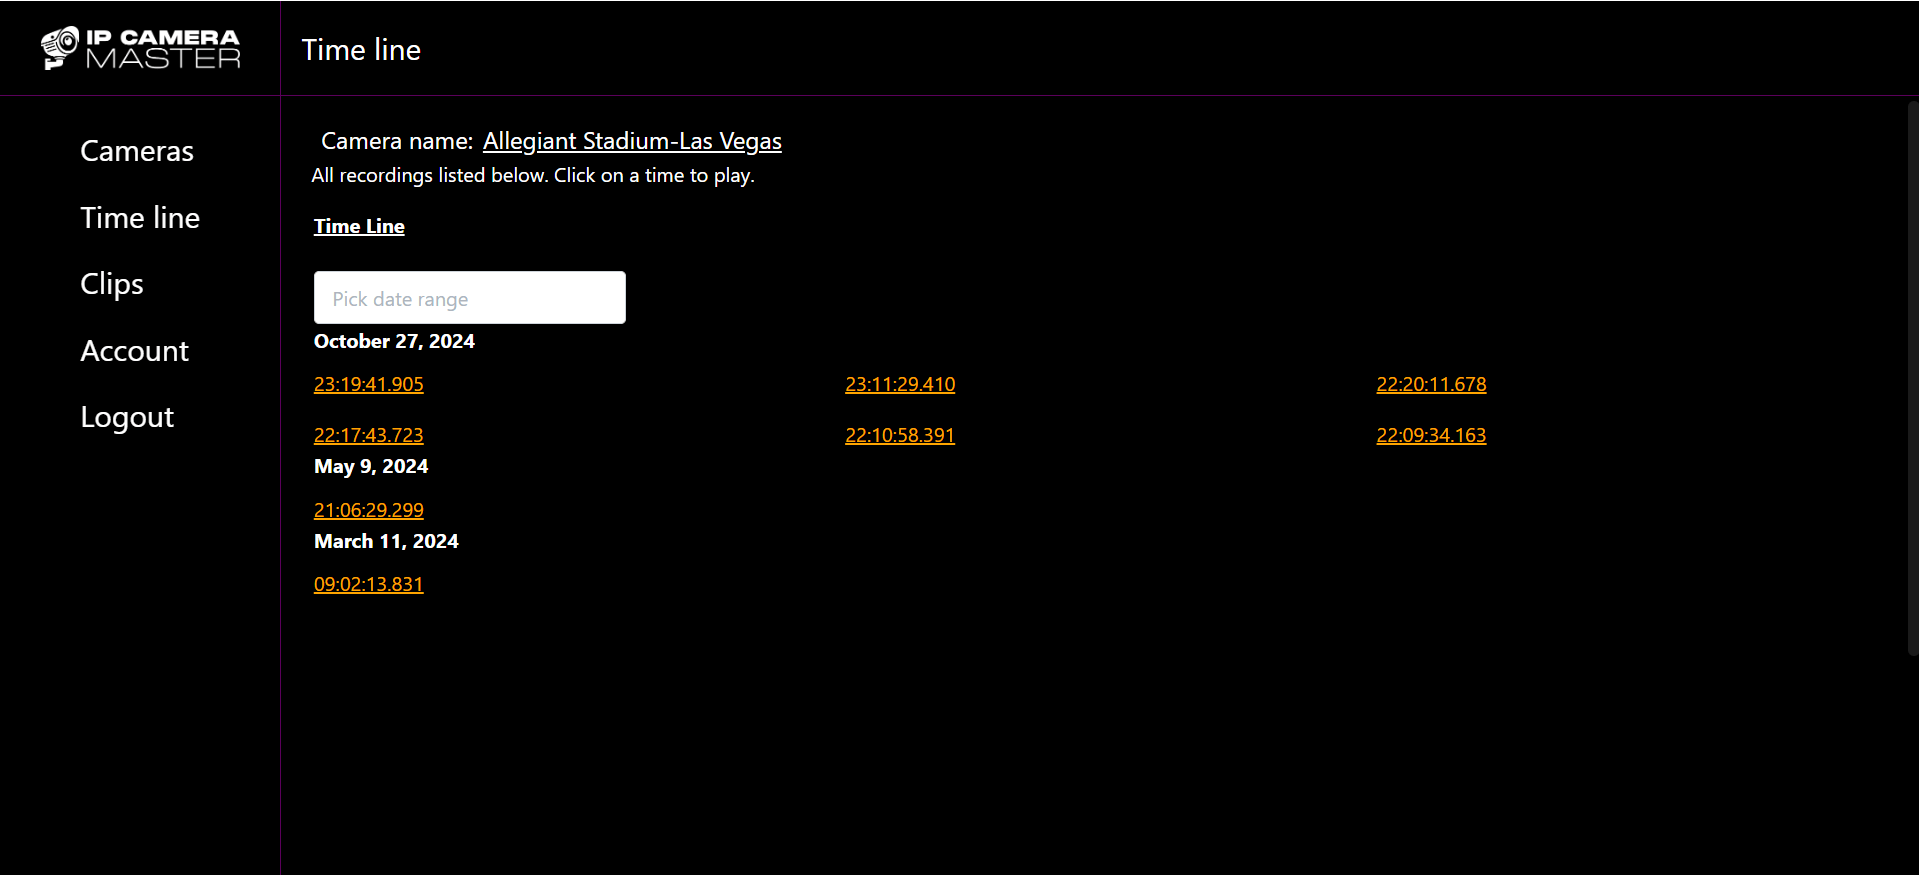
IP Camera Master organizes your recordings into 6-hour segments. You can click on any segment to play the recording. Additionally, you can filter recordings by selecting a specific date range.